How to create and use Canned Replies
Nov 1, 2021
In this guide, you’ll learn how to use and create Canned Replies with Inbox.
Canned Replies is an Inbox feature that allows you to set up automatic responses — which work as templates — for incoming messages. Agents will be able to pick the reply from a drop-down, saving them time in resolving tickets.
How to create Canned Replies?
Keep in mind that only managers can create Canned Replies. Go to inbox.messagebird.com, tap Settings on the side navigation, select Canned Replies from the sub-navigation and click Add canned reply. This will take you to the following modal:
Pick an existing category from the drop-down menu, or add a new category. For our example, we’ll create the category welcome_inquire.
Enter a Name — make the name as descriptive as possible, so your team can choose the right canned reply. For our example, we’ll name the canned reply, Welcome_helpcenter.
Enter the response in the Reply Text field. For our example, it will be: Welcome to Inbox {name}! Thanks for reaching out! What seems to be the problem? We might take a while to respond, so in the meantime, feel free to visit our Help Center; that might answer your question already!“
Click Save when you’re finished.
Your new canned reply will be automatically added to your Overview.
And that’s it! Now you know how to create Inbox Canned Replies.
Using Canned Replies
In this guide, you’ll learn how to use Canned Replies with Inbox.
Canned Replies is an Inbox feature that allows you to set up automatic responses — which work as templates — for incoming messages. Agents will be able to pick the reply, saving them time in resolving tickets.
Sending a canned message
Here's how to view and send Canned Replies when you're working on a ticket.
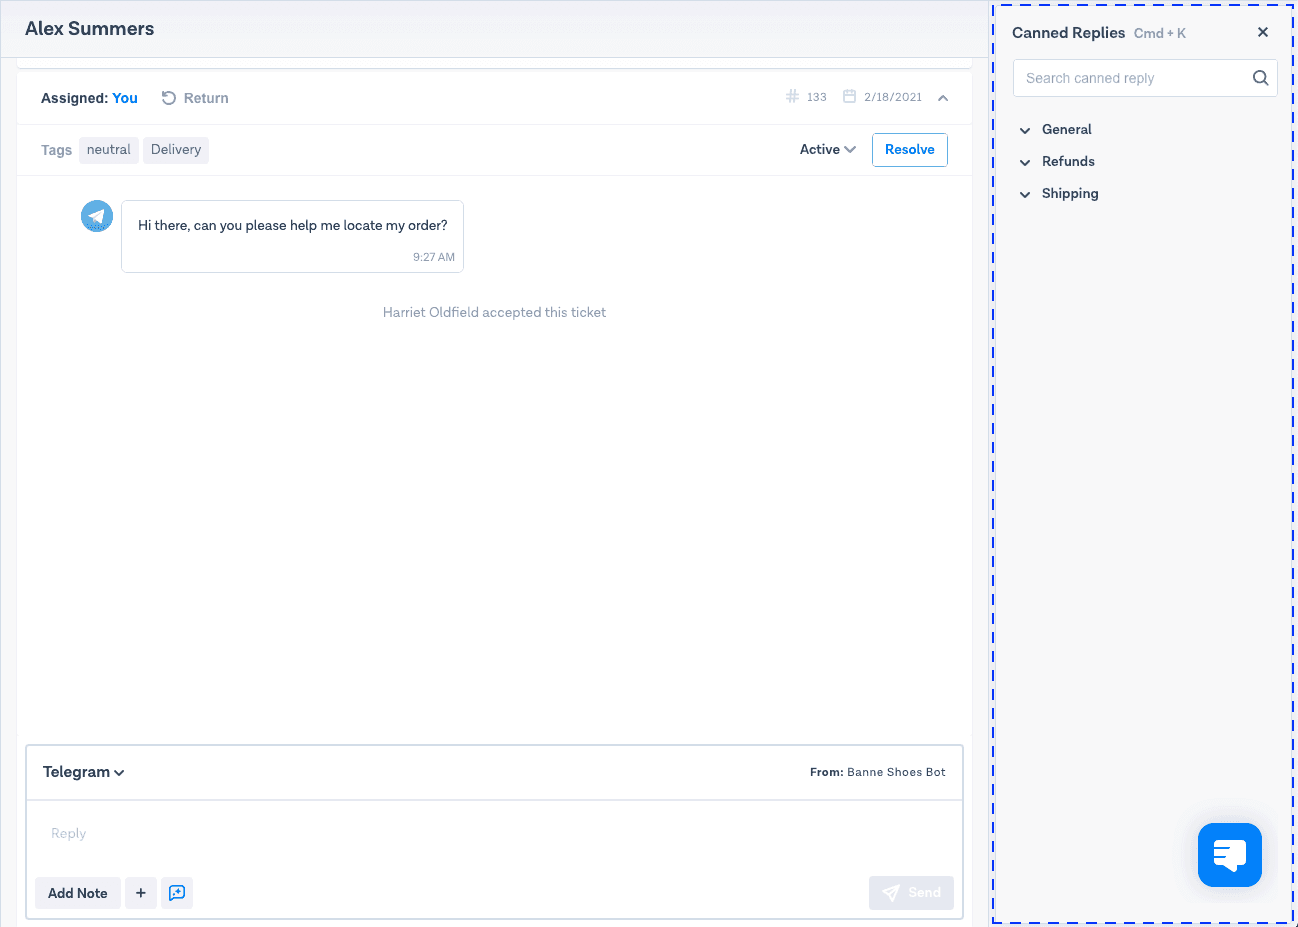
Click the Canned Replies icon, just to the right of the '+' symbol. The Canned Reply categories will be displayed in a panel on the right-hand side of your screen.

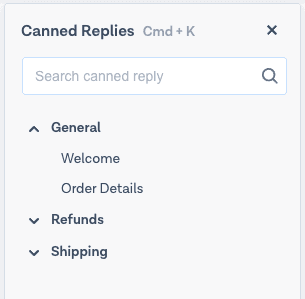
Click on the relevant Canned Reply category to expand it.

Every Canned Reply in that category will be displayed. Click on the one that you want to use.

The Canned Reply will be automatically pasted into the conversation, ready for you to review before sending! If there is placeholder text in the template, such as {name}, make sure that you manually replace this with the information of the customer that you are talking to.

When you've reviewed your message and you're ready to send it to your customer, click Send!
To close the Canned Replies panel, click on the canned replies icon again. The panel will also close automatically if you navigate to a different screen.
Keyboard shortcuts
To access the Canned Reply panel quickly, you can use the following keyboard shortcuts:
On Apple computers, use Cmd+K
On Windows systems, use Ctrl+K
From the search box, you can click the Esc key to close the Canned Replies panel.
The search function
If you have a lot of Canned Replies, use the search function to find the one that you need! Follow these steps to search Canned Replies when you're working on a ticket:
Click the Canned Replies icon. All of the canned reply categories will be displayed in the panel on the right-hand side of your screen.
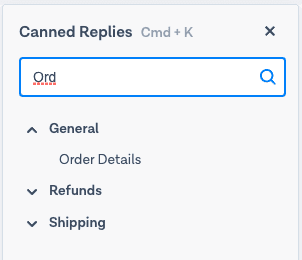
In the search box, start typing a keyword or title of the Canned Reply that you're looking for.

As you type, the list of Canned Replies will automatically start to filter down results to match the keyword or title that you're searching for.
Click on the Canned Reply that you want to use, then follow from step 4 in the 'Sending a canned message' section.
